9 Deploying to shinyapps.io
Once you have created a Shiny app, often the next consideration is how this app should be shared with others. While there are a number of different options (e.g., hosting online, running apps locally, saving app as a function), the simplest way to make your app widely available is to deploy it to the shinyapps.io website using servers hosted by Posit. Doing so is particularly easy since it:
- requires minimal effort on the developer side to initially deploy and subsequently update Shiny apps
- can be deployed for free (with a few restrictions on number of apps and app usage)
- requires no knowledge of virtual environments/containters/etc commonly used for deploying web applications
Additionally, it is freely available to users of your Shiny app once they can access the associated URL link. Therefore, the information provided below will focus on how to deploy your apps using shinyapps.io. But please visit the linked websites and the shinyapps.io User Guide.
9.1 Getting started
To deploy a Shiny app from your local computer (ideally from the RStudio IDE), you’ll need to have the {rsconnect} package installed. If you haven’t already done so, you can install this package by running install.packages("rsconnect") in your console. Next, you’ll need to create an account on the shinyapps.io website by clicking the “Sign Up” button. You can either provide your own email address and password, or directly link to an account through Google or GitHub. If you already have a GitHub account that you use regularly, I recommend using this approach. After signing up, you’ll be asked to create an account username. Thoughtfully select your username since this will be included in the URL of all future Shiny apps you deploy to shinyapps.io. So if apps are expected to be deployed for a lab group or on behalf of a government organization, it makes sense to choose a username that reflects the group or organization.
9.2 Connecting your shinyapps.io account with RStudio
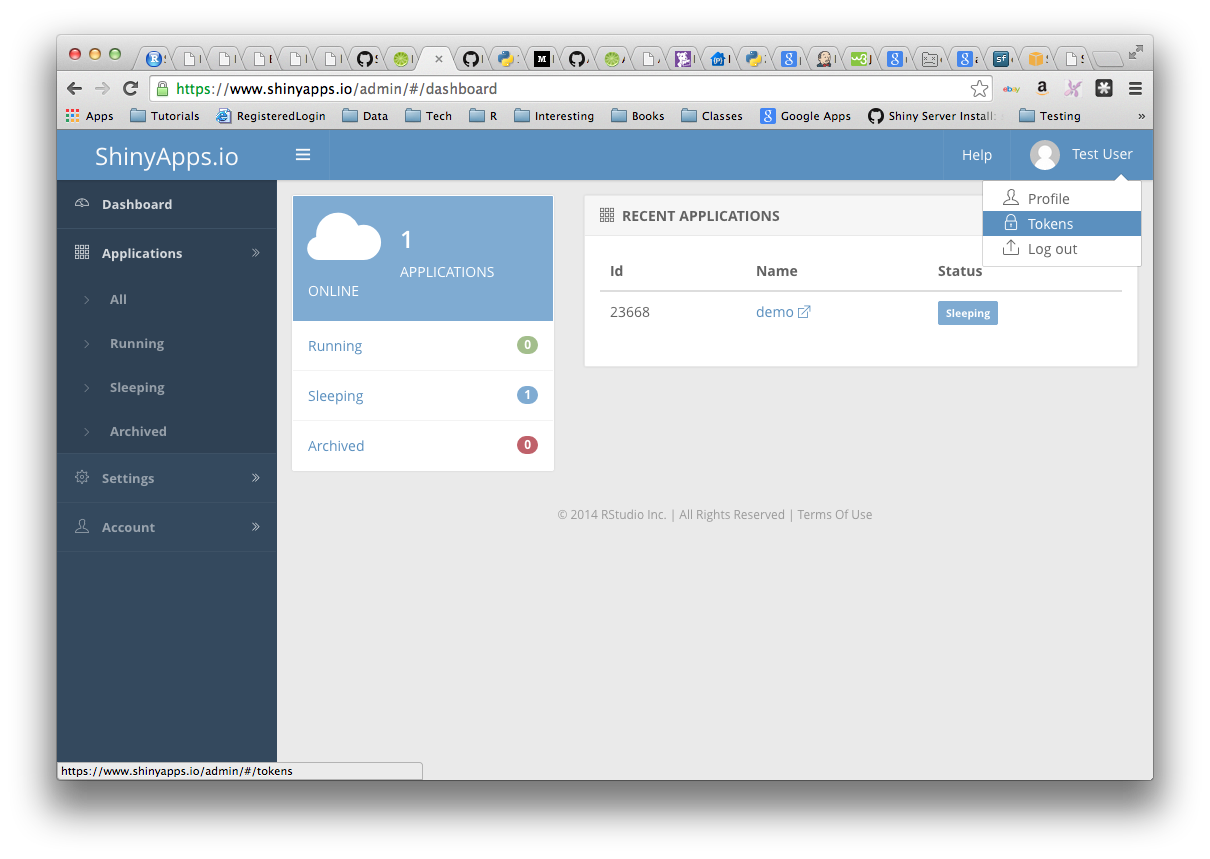
We now need to connect the shinyapps.io account that was created with RStudio in order to deploy these apps to the proper place, which is where {rsconnect} comes in. To do so, click on your username in the upper right-hand corner of your account on the shinyapps.io website and then select “Tokens” from the dropdown menu.

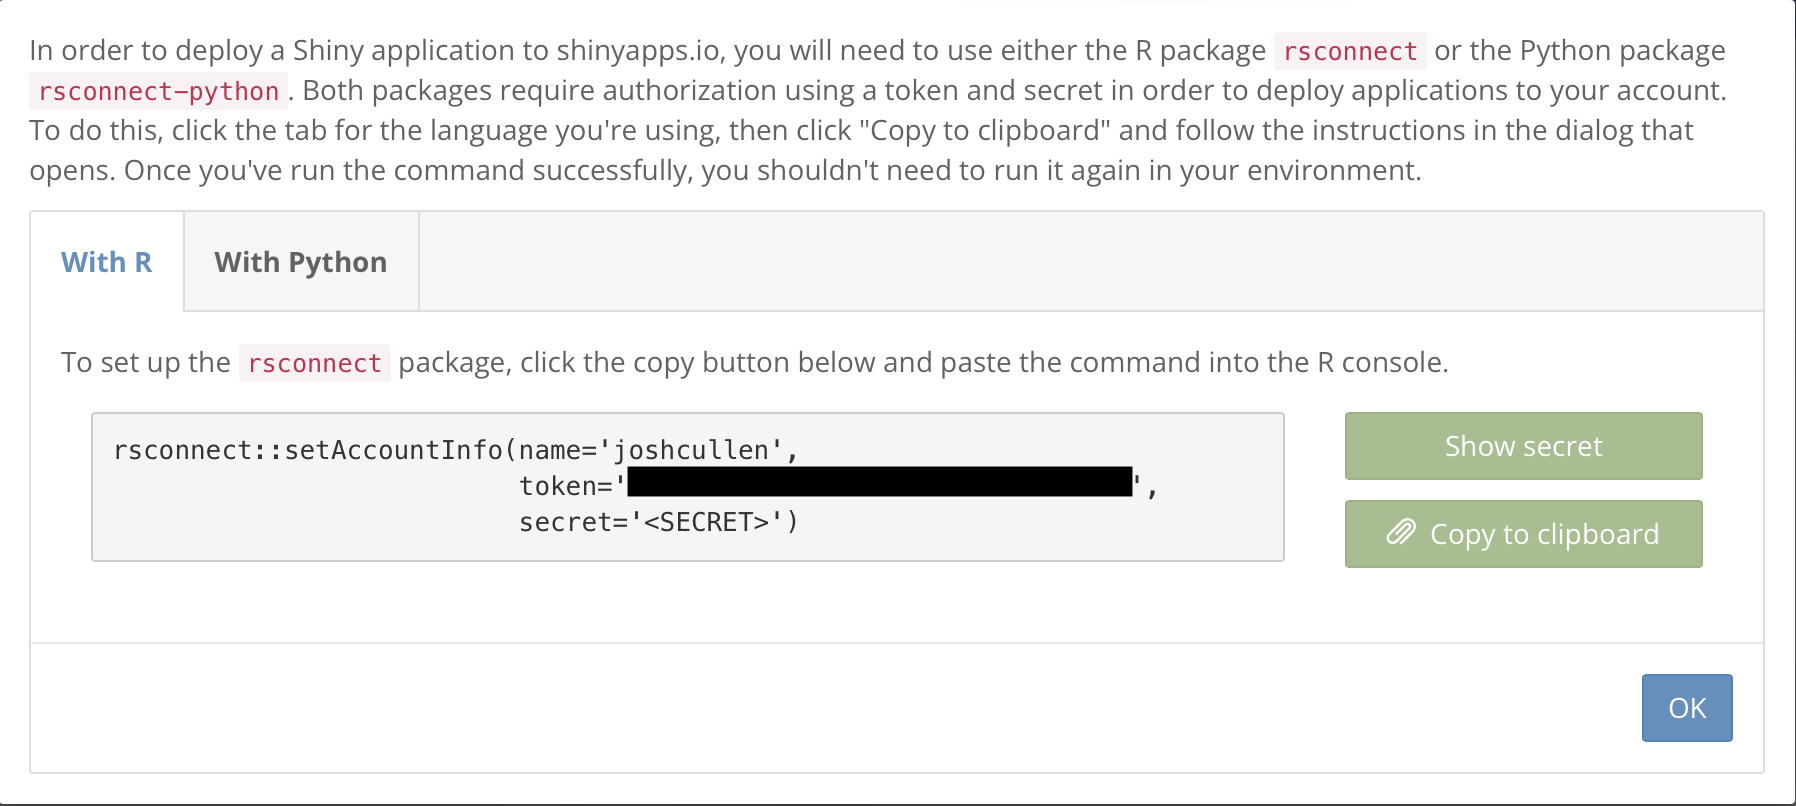
You’ll then click the green “Add token” button on the right, followed by the blue “Show” button for the newly created token. In the pop-up window, you’ll click the “Show secret” button followed by the “Copy to clipboard” button. Next, paste and run this code in the RStudio console to link your account.

9.3 Deploying your Shiny app
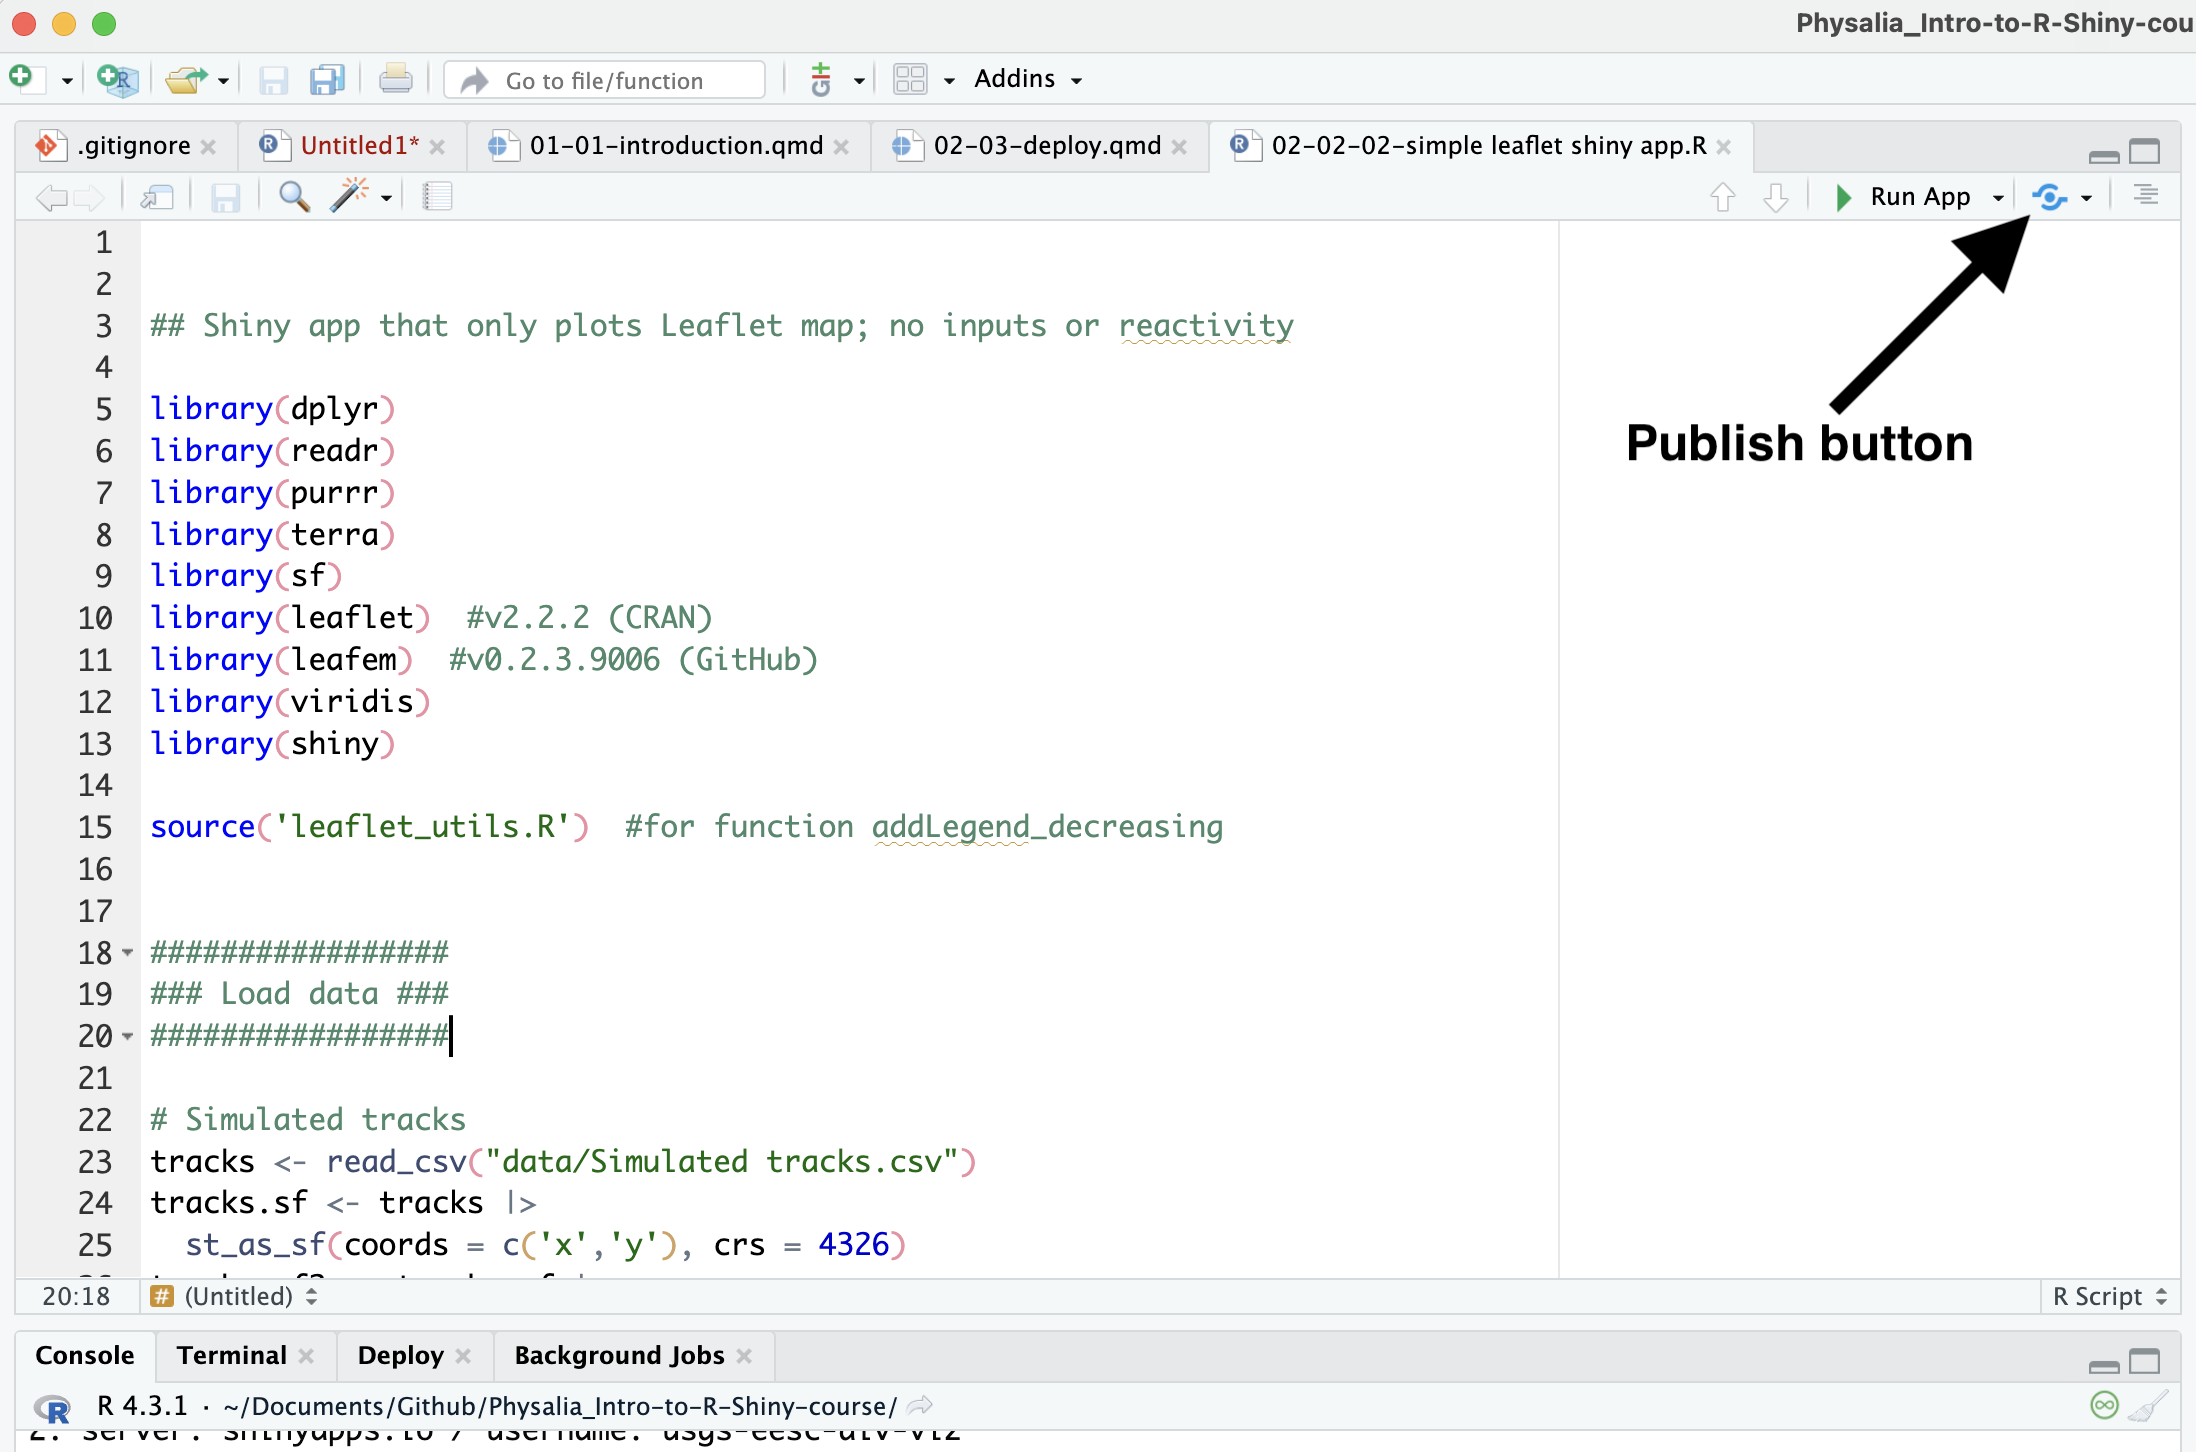
Now that all of the configuration steps have been completed, we can move on to deploying the app online. This can be accomplished by clicking the circular blue button (in the upper right of your “Source” window next to the “Run App” button) to publish your app (or potentially other R Markdown or Quarto documents).

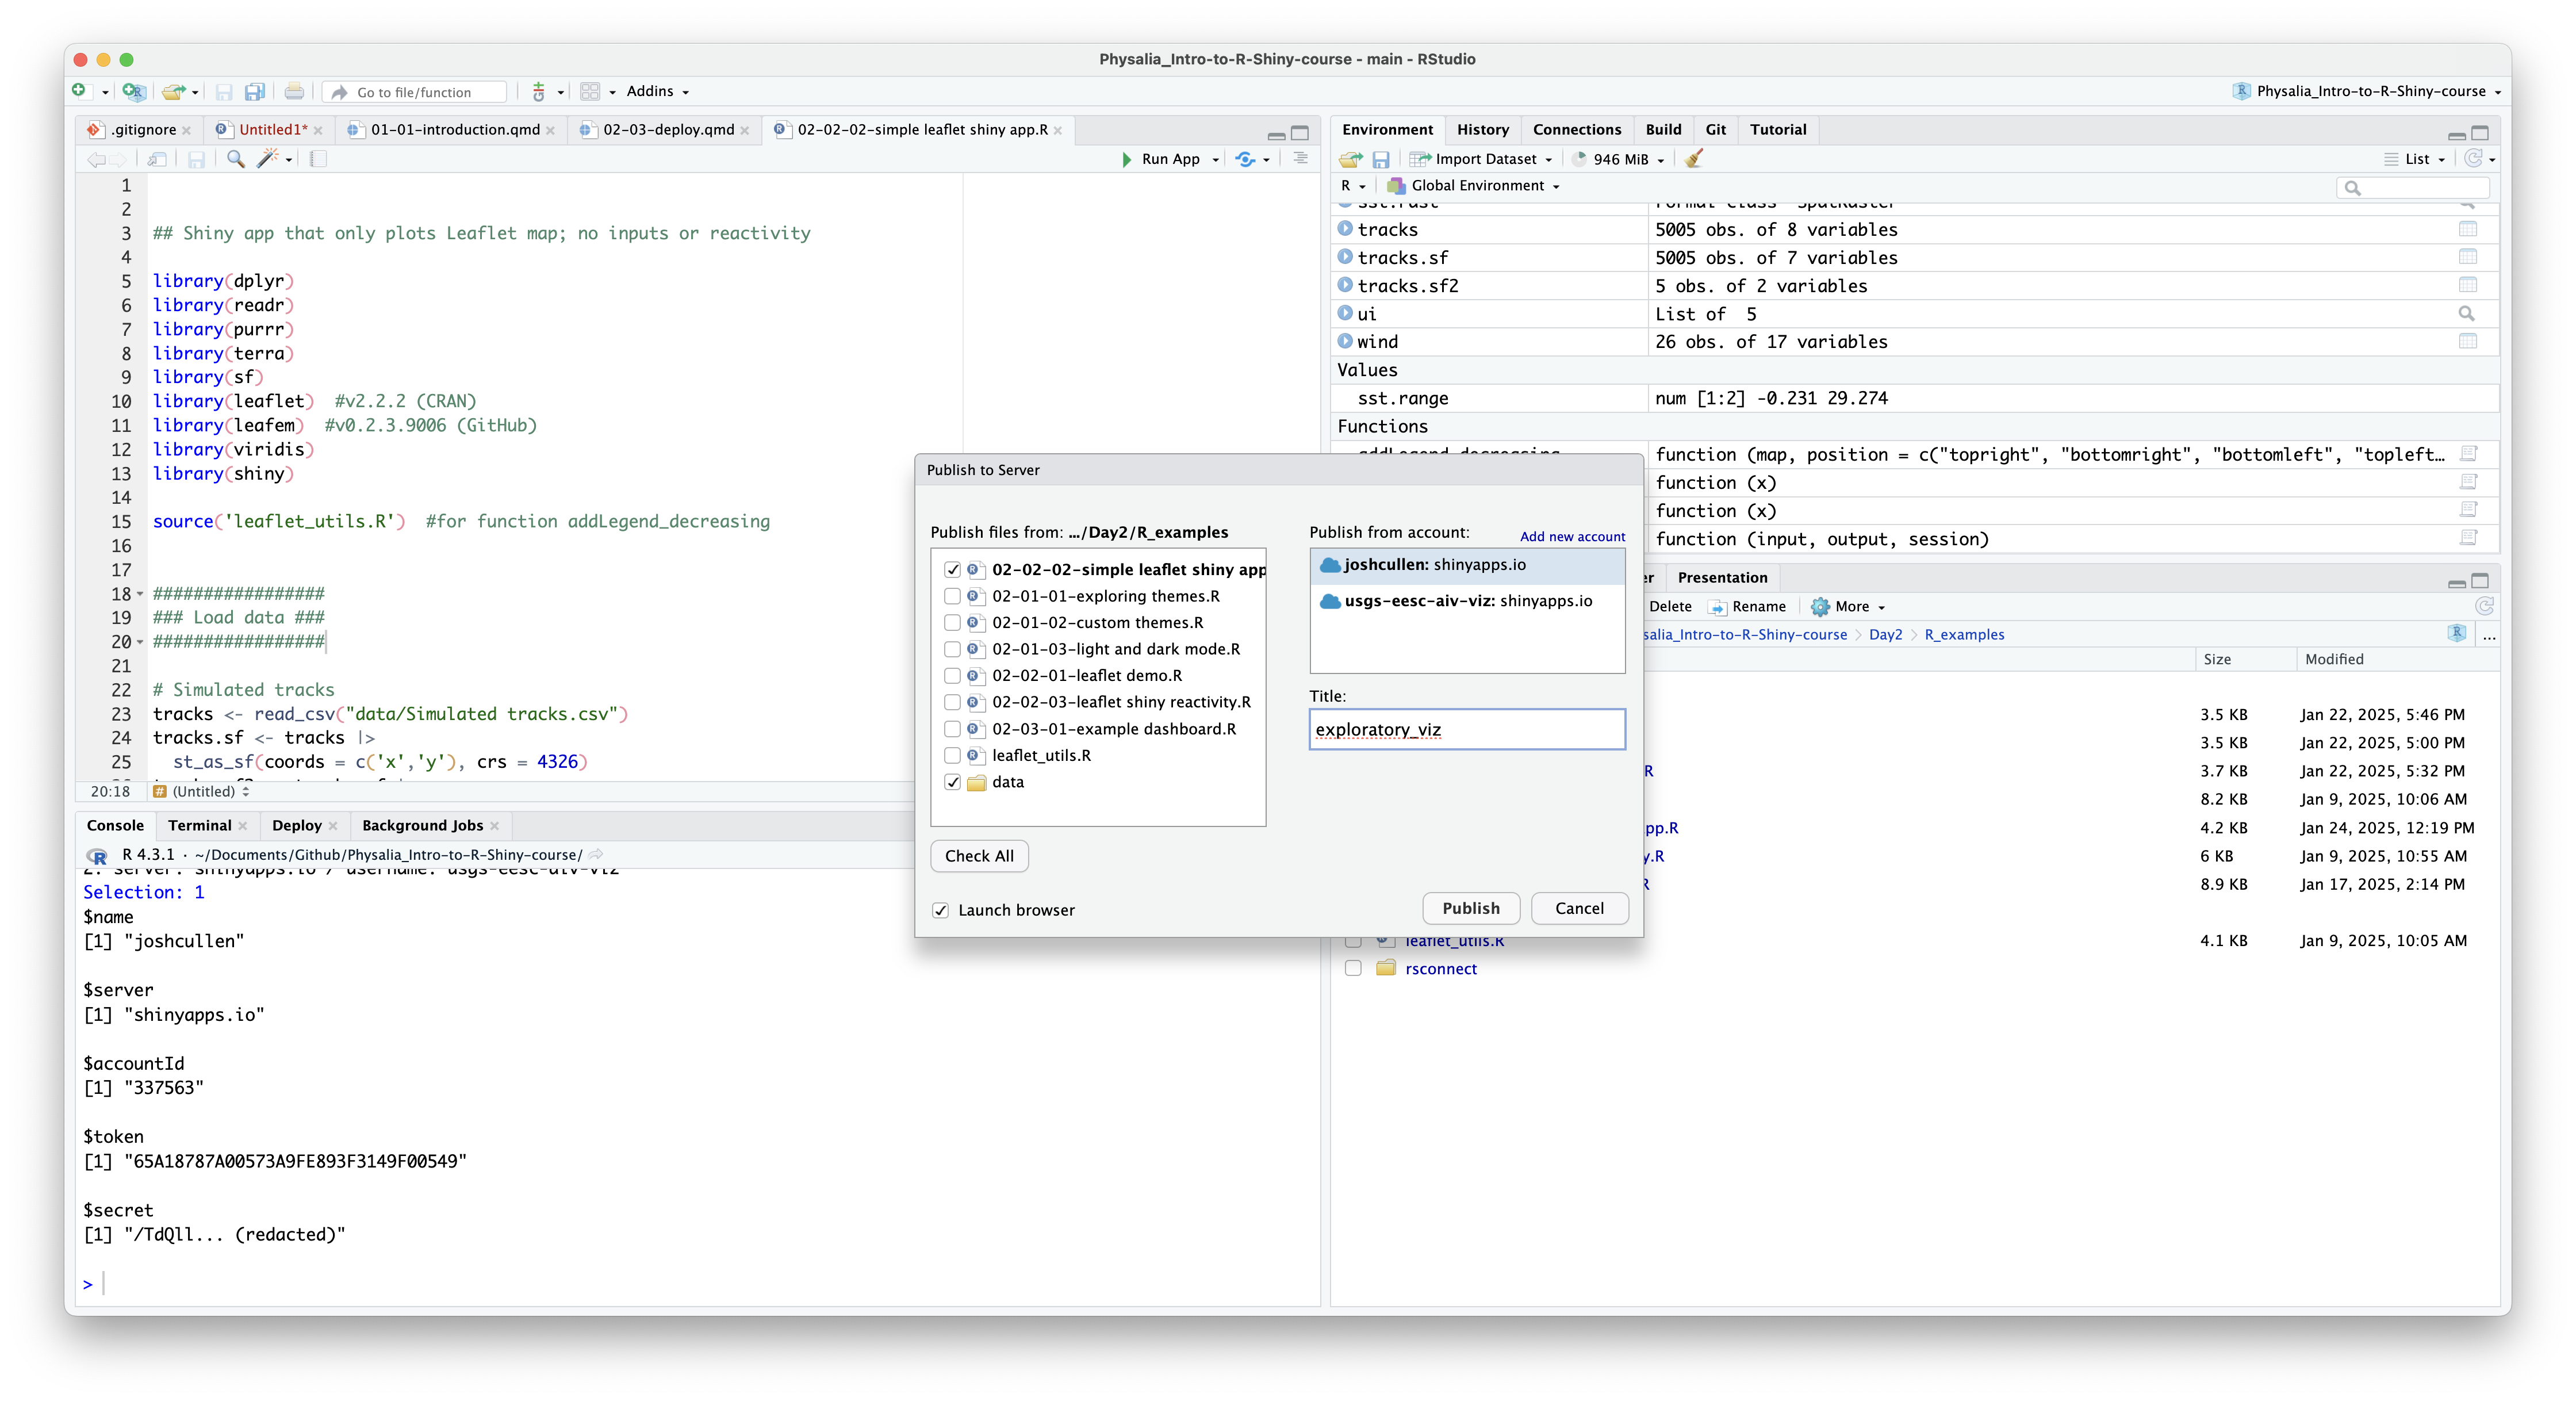
This will pull up a pop-up window for you to select which files will be published and deployed with your app to shinyapps.io. If you don’t see your shinyapps.io account listed on the right, click the “Add new account” link and follow the instructions. There may be instances where there are files in your app’s working directory that aren’t relevant and you don’t want or need to publish. Make sure only to check the boxes for the relevant files or folders. Additionally, you should carefully choose the app’s title, which will also be included in the URL in addition to your username. While you may be prompted to edit this title, make sure that there are no spaces or special characters other than spaces or underscores.

Once you’ve made selections to your satisfaction, click the “Publish” button and wait while the app is fully bundled to deploy online. Depending on the size of the files included and the number of R packages (and associated dependencies used), this may take anywhere from a few minutes to potentially 30 min or longer. Since there are potential issues that can arise from timeouts while deploying your Shiny app, it is recommended that file sizes be minimized as much as possible for larger apps, as well as selecting only R packages that are necessary. For example, try avoiding the use of {tidyverse} and instead only load individual packages that are used within the app since some of these packages can have many additional dependencies. Once the app has been successfully deployed, it should automatically open within your browser. You can then explore metrics of general usage of your Shiny app and manage them from your account on shinyapps.io. Congrats, you just deployed your first Shiny app! 🎉🎉
There are a number of useful resources related to deploying apps to shinyapps.io, including the User Guide mentioned above, a Posit Community forum, the shinyapps.io FAQ page, as well as individual posts on websites such as StackOverflow.
9.4 Extra: different formats for publishing
While not covered during this short course, there are a few different ways that Shiny apps can be organized and published online. All examples shown here included the data, UI, and server components within a single file app structure (which typically is saved in a app.R file). When creating larger and more complex Shiny apps, this can get a bit unwieldy and make it difficult to maintain, update, and debug. Therefore, it may be more useful to switch to a two file app (ui.R, server.R) that separates out the UI and server into separate files. It also may make sense to turn this into three files, where a global.R file is added that may contain the code to load in R packages, data, and do any pre-processing outside of the UI and server components. If wanting to include images that are saved locally on your computer, it is also recommended that these be stored in a folder labeled www, which will be checked by default in R when running the app.
Shiny apps can also be created from other file types besides just R scripts. This includes creating a Shiny app within an R Markdown or Quarto file, which can also be deployed to shinyapps.io using the same approach described above. For those familiar with the syntax for creating .rmd and .qmd documents, this is a fairly simple adjustment that make it even easier to configure interactive dashboards.